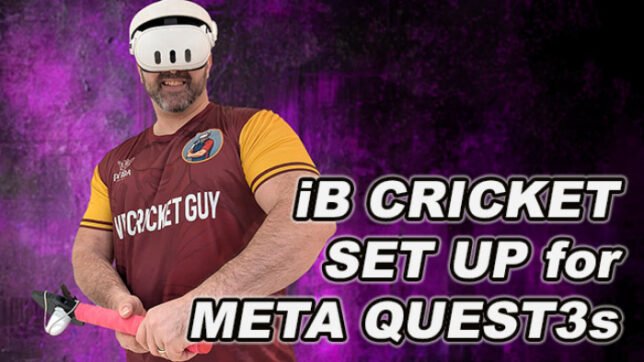
Hey everyone, it’s VR Cricket Guy here! 🏏
If you’ve just unboxed a shiny new Meta Quest 3S (or you’re thinking about getting one) and you’re dying to step into a virtual cricket stadium and start batting like your heroes, you’re in the right place.
iB Cricket is still one of the most realistic and immersive VR cricket games available in 2026. The Quest 3S is perfect for it – lighter, more affordable than the Quest 3, with excellent tracking and crystal-clear visuals that make every shot feel real.
The best part? Getting set up is actually pretty simple once you follow the right steps. I’ve helped thousands of beginners through my videos, and this guide pulls everything together into one easy-to-follow checklist.
By the end of this post you’ll be ready to play your first match – no tracking issues, no frustration, just pure cricket action.
Let’s get you into the middle!
What You’ll Need Before You Start
- Meta Quest 3S headset (fully charged)
- At least 6 ft x 6 ft (2 m x 2 m) of clear floor space (bigger is better for big swings)
- Strong Wi-Fi connection
- (Highly recommended) A dedicated VR cricket bat – using just the controllers works, but a proper bat makes the whole experience 10x more realistic
Money-saving tip: Use my VRCGUY discount code at the Meta Quest Store checkout for 10% off iB Cricket and pretty much every other VR game. It works on all games, so grab it while you’re there!
Step 1: Set Up Your Meta Quest 3S (10–15 minutes)
- Unbox the headset, remove all protective films (especially from the lenses), and charge it fully using the included cable.
- Download the free Meta Horizon app on your phone (Android or iOS).
- Put on the headset and follow the on-screen instructions: connect to Wi-Fi, log into (or create) your Meta account, and adjust the headstrap and IPD (interpupillary distance) for comfort.
- Set up your Guardian boundary – choose Roomscale mode and make the boundary as generous as possible. You’ll need room to swing the bat properly, so give yourself extra space on all sides.
Pro tip: Good, even lighting in the room helps the Quest 3S cameras track the controllers better. Avoid pitch-black rooms or direct sunlight hitting the lenses.
Step 2: Prepare Your Play Space (The “Cricket Pitch” in Your Lounge)
iB Cricket officially recommends a minimum 6 ft x 6 ft clear area, and I completely agree.
- Move furniture, rugs, pets, and kids out of the way.
- Make sure you can take a full back-lift and follow-through without hitting anything.
- Stand roughly in the centre of your Guardian boundary.
Once your space is ready, you’ll forget you’re in your living room and feel like you’re at the MCG or Eden Gardens.
Step 3: Buy and Download iB Cricket
- Put on your Quest 3S and open the Meta Quest Store.
- Search for “iB Cricket” – it’s the one by vSport with the realistic stadiums and crowd roar. Or use this direct iB Cricket discount link
- At checkout, enter code VRCGUY to get your discount.
- Hit purchase – the game is around $29.99 (price can vary slightly) and downloads quickly on the Quest 3S.
Once it’s installed, launch it from your library. The first time it loads you’ll be asked to do some basic calibration – just follow the on-screen prompts.
Step 4: VR Bat & Controller Setup (This Is the Make-or-Break Step)
Most beginners get tracking issues here, so pay attention!
If you’re using just the Quest controllers
- Hold them normally – the game works fine to start.
If you have a dedicated VR cricket bat (the one I recommend from vrmerchstore.com):
- Insert the right controller into the bat handle (make sure the batteries are fresh).
- Critical orientation tip: When you’re in your batting stance, the black part of the controller (the part with the tracking ring) should face towards you. This is the #1 fix for tracking drift on Quest 3/3S.
- Launch iB Cricket → Go to Practice Nets or the bat setup menu.
- Follow the in-game calibration – it only takes 10–20 seconds.
I have a full video tutorial on this (search my YouTube or TikTok for “How to set up your VR cricket bat in iB Cricket”) if you want to see it in action. Use code VRCGUY when buying the bat too!
Step 5: Your First Session – Tutorials & Practice Nets
Once you’re in the game:
- Start with the built-in tutorial – it’s actually excellent and teaches you timing, shot selection, and how the realistic physics work.
- Spend your first 15–20 minutes in Practice Nets or Coaching Mode.
- Try different deliveries (pace, spin, bouncers) and focus on timing rather than power at first.
The physics in iB Cricket are brilliant – middle the ball properly and it flies just like in real life.
Beginner Tips to Get You Scoring Runs Fast
- Start on Easy or Medium difficulty. Ultra Insane bowling can wait until you’ve got the basics down!
- Keep your swings smooth and natural – don’t try to murder every ball.
- Stand a realistic distance from the “crease” (the game gives you visual cues).
- Relax your grip – tense hands kill timing.
- Take regular breaks – even short sessions are massive fun and great exercise.
You’re Now Ready to Play Proper VR Cricket!
That’s it – you’re fully set up and ready to bat in front of roaring crowds from your own home.
Once you’re comfortable with iB Cricket, come back for my next guides:
- How to destroy Ultra Insane bowling
- Mastering spinners in VR
- Best VR cricket bats 2026 buyer’s guide
And if you’re loving the immersive feel of iB Cricket right now… just wait until my own VR Cricket Guy – Career Mode game drops later this year. It’s going to take village and league cricket in VR to the next level!
Quick action step: Head to the Meta Quest Store right now, search iB Cricket, and use code VRCGUY to grab it cheaper.
Drop a comment below and tell me:
- Did you already own a Quest 3S?
- What’s the first shot you want to master?
- Any setup questions I missed?
I read every single comment and reply to as many as I can.
Now go smash it out of the park!
VR Cricket Guy 🏏🔥